This page is about the process of pinhole photography and shows some of the cameras which I've made. Further down there is also some information on pinhole solargrams
This website contains many examples of pinhole photographs, and these can be found on the pages for the projects to which they relate.
If you're building a camera, there's plenty of practical info & technical stuff here:

Also, do check out pinhole photography day , a wonderful & non-judgemental global community event in which I try to participate every year.
A pinhole photograph is simply one which has been made using a pinhole, rather than a lens, to focus the light. Strictly speaking, the pinhole doesn't "focus", it simply excludes all but a tiny point of light for each viewpoint, and thus the final image is built up. This is the principle behind the camera obscura (literally a darkened chamber) which dates from ancient times.
You can experiment with the concept quite simply. On a sunny day, choose a room with a small window & find a piece of black paper to cover the window. Make a small hole about 10mm diameter in the centre of the paper and attach it securely to the window frame so that it excludes all of the light except that coming through the hole. Shut the door and sit tight. When your eyes have adjusted, you'll see on the wall opposite the window a faint image of the outside world - upside down: magic! (Well, basic physics, actually.) A piece of light-sensitive material held in the same place would capture the image. A typical pinhole camera is somewhat smaller than your darkened room although, in a record-breaking frenzy a few years ago, a team of people in the USA used a disused aircraft hangar and a 33mx26m sheet of sensitized fabric to create the world's largest pinhole photograph. I don't think we'll be attempting to beat that anytime soon!
Pinhole photographs can be made using conventional photographic film or paper, a digital camera sensor, or even some yet-to-be-invented device. Provided there is no lens and a pinhole is used insted, they're all pinhole photographs.
I'm sure that everyone who's dabbled in photographic processes has at some point experimented with making a pinhole camera. Usually the construction is somewhat haphazard, and relies on a cardboard box and large quantity of black gaffer tape. It's fine for experimentation, especially if you have a darkroom close by, but for a week away, you need a whole crate of them!
Martin's universal pinhole camera
In the winter of 2006, I set out to make a pinhole camera which could actually be used as a serious photographic tool. The major obstacle to the cardboard box approach was the awkwardness in loading paper or film, and my intention for the new camera was to allow it to use standard 5x4" film holders. In the end, I designed the camera with a universal back which takes not only 5x4" holders, but roll-film holders and a polaroid instant-film back too. The latter is very much a museum piece now that polaroid instant film is no more, but the 6x9 & 6x12cm roll-film holders have become my standard formats for pinhole work, with the convenience of being able to load film and wind-on in daylight easily outweighing the slight reduction in viewing angle over sheet film.
I purposely built the camera in modular format, separating the complex back section from the main body & pinhole assembly in order that I might experiment with different focal lengths. Since I prefer a fairly tight crop for most of my photography, I opted to design the first body module around a focal length of 90mm, giving a viewing angle of 63° with 6x12 rollfilm.
More recently I've added a wide-angle variant with a focal length of 50mm, giving a viewing angle of 90° with 6x12 film. Even when using the 6x9cm format I get 79° which is wide enough for most purposes and, more importantly, allows me to make optical prints in my enlarger. With the larger film formats I have to scan them first, or be content with contact prints.


The "gondoliers" anamorphic camera
While rummaging through my workshop a while back I came across a box of metal cans & biscuit tins: an assortment of steel food containers which for years I've been saving up for potential pinhole cameras. This one in particular took my fancy.
Don't ask what The Gondoliers can originally contained: some conglomerate of industrial food additives as far as I can tell. Fortunately it's now empty, but I scrubbed it out well just in case.
Anamorphic, which I guess literally means a renewed form, is a term often used to describe cameras where the film plane is perpendicular to the pinhole (lens) rather than the usual arrangement of being parallel to it. It takes a bit of thought to imagine what kind of photographic representation will result, but it's fun to play with.
The Gondoliers is 85mm diameter x 175mm long and takes a trimmed down sheet of 10x8 photographic paper. The term "focal length" is a bit of a misnomer here, but it varies from 43mm to 180mm, with the main useable image area around the 90mm mark. With a 0.4mm diameter pinhole, that's 90/0.4 = f/225.

The pinhole (made from beer can as usual) is in the lid. A piece of black tape serves as a shutter.

With the camera in the position shown above, the paper negative is wrapped around the inside surface of the can with the seam at the bottom (so that the edges of the negative correspond to the zenith).
Self-portrait with dinosaurs & Jack Daniels, a sample image, is shown below. The JD box is used in this composition because its straight edges and rectilinear form help to illustrate the level of distortion produced by the camera. There's a fair amount of light fall-off at the "long" end of the view because the negative is much farther from the pinhole. At the "wide" end, the angle of view is almost 360 degrees, from the sky at each edge (looking up), to the table & dinosaurs in the centre (looking down). Imagine the sides of the photo rolled up into a tube & you'll see, I hope...

creating solargrams with pinhole cameras
Solargrams chart the passage of the sun through the sky. The image is built up over the period of exposure which can range from several days to a year, or more. This is much longer than the typical exposure time for pinhole cameras, and orders of magnitude greater than the near instantaneous exposures of most "ordinary" cameras.
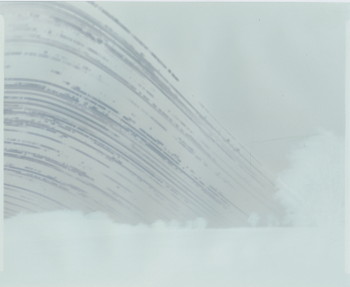
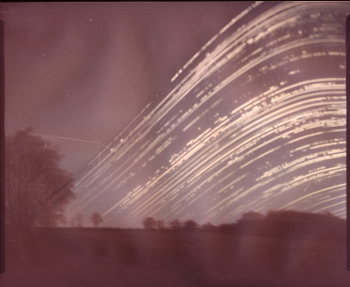
The solargram below was made using a 5 month exposure onto photographic paper. The faint grey image shows the paper as it appeared when removed from the camera. The second image shows the result of colour inversion and left-right flip. The process is a convenient mix of new & old technologies, where silver halide sensitized paper is combined with digital scanning and image inversion. Its great advantage is that no chemical development or other processing is required.
To form the image use ordinary black & white photographic paper. Resin coated Ilford MGIV is probably the most widely available & this is what I use. Pretty much any (even outdated) paper will be fine, although resin coated is preferable to fibre based which will be more prone to moisture absorbtion and mould growth during the long exposures. The paper needs to be loaded into the camera under a red safelight, or very subdued room lighting: candle light is fine!
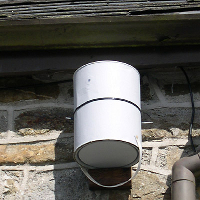
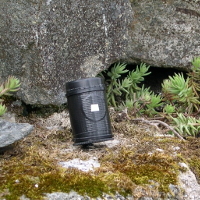
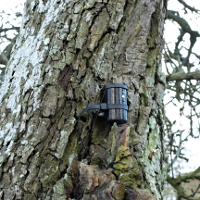
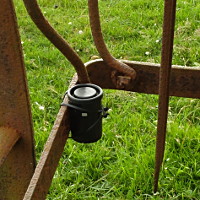
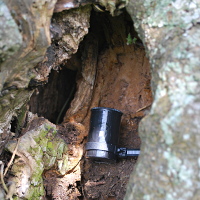
The camera need be nothing special, but it must be weatherproof! Steel paint cans of various sizes are ideal, as are 35mm film canisters. The pinhole can be made as per the details on my pinhole tech page. The interior of the can should be painted matt black to prevent internal reflections, and some means of wedging the paper in place should be devised. Also, the camera itself must be very firmly fixed in place, as any movement will cause blurring of the image. Some examples of solar cameras are shown at the bottom of this page.
The exposure can be from several days to many months, and will result in a very faint image similar to the one shown above left. When the exposure is complete, the paper should be removed under subdued light, dried if necessary & scanned.
Scanning the image is the most critical stage in the process because the original image will be DESTROYED by the bright scanning lamp (or at least severely damaged). Therefore, only one scan is permitted, and the scanning process should take no more than about 15 seconds for the whole sheet. To ensure success, the scanner should be set up and tested on a dummy image first. An identical sized sheet of white paper with a few light pencil marks is ideal for this. The scan should occur in a single uninterrupted pass at the desired resolution. If the mechanism pauses during the scan, the resolution should be reduced: 300 ... 600ppi is generally sufficient and ensures a reasonably rapid scan.
If you don't have access to a scanner, it's possible to use an SLR/mirrorless digital camera if you have a close-focusing lens, but this needs to be set-up on a tripod and focused in advance, with the room light switched on only briefly for the exposure.
The scanned image should be colour-inverted and flipped left-right to create a correct positive. At this point, the contrast of the image can be adjusted as required. The "image - curves" tool in GIMP or Photoshop is most useful here. Other adjustments and retouching of blemishes may also be carried out. Left unadjusted, the image colour tends to various shades of pink, mauve & blue, depending on aspects of weather, scanning procedure & paper type. I think this unpredictability adds to the charm of the finished solargram, so I generally leave the colours as they happen to emerge.
A few solar cameras:
Images from these can be found on my pinhole solargrams main page.



All contents © Martin Winfield, 2016.